Making map: Working with textures
In this article it describes:
-
– Texture browser overview.
– Texture mapping.
– Texture export/import.
– Properties and options.
– How to create simple animated texture.
I think everybody knows what texture is. It’s picture that puts to different surfaces. In this article I make advanced tutorial about textures using in Unreal Editor.
Texture browser
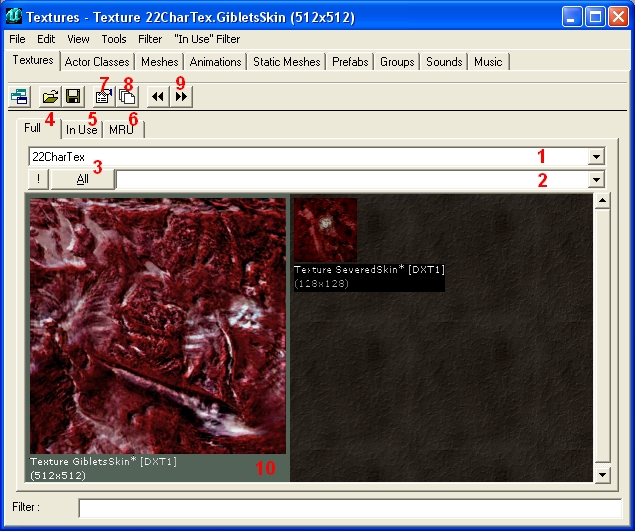
This is tool for texture choosing, viewing and editing. You may open it by using View > Show Texture Browser menu item or just appropriate button clicking (at top tools panel)  . Also it opens at Unreal Editor starts.
-
1 – current texture package
2 – texture group
3 – show all package content
4 – general view mode
5 – textures used by current map
6 – most recently used textures
7 – show texture properties
8 – open texture original package
9 – fast switching between groups
10 – selected texture
Texture browser may be used to open texture package and make new one in utx format. Package may consists of texture groups. You can elect package at top field and chose group at bottom one. You may use filter for better viewing and fast searching. Also you may set texture view size on View tab..
Texture mapping
To map texture on brush you should select brush surface and click on texture in browser. Frequently texture maps incorrectly. You may tune it using Pan, Rotate and Scale tools in Surface Properties

-
1 – Texture shift (in pixels, relative to size)
2 – Rotation/reflection
3 – Texture size relative to pixels/Unreal Unit
4 – The same for height/width separately
5 – Use relative to current size
6 – Light map size of current surface
U – width, V – height.
Holding Shift you may rotate/move texture indirect. You may also use  Texture Pan and
  Texture Rotate . tools. In Texture Pan you may move texture by holding Ctrl with LMB/RMB or resize holding Ctrl with both buttons. Texture Rotate is the same for texture rotating.
Import
To import texture select File > Import menu item in texture browser. It opens window below.

Теперь подробнее.
-
1 – Package. Where you want import. It should uses MyLevel to save textures inside main map file.
2 – Group. Package group.
3 – Name. Texture name (same name will replace old one).
4 – LOD. Levels of texture detalization. It makes several quality kinds of texture for using on different view distances. Set 0 for maximum quality.
5 – Masked. Check if texture has transparent parts. E.g.:
-
6 – Alpha. Same as Masked but handles different transparency degree (alpha channel). If you don’t care always use instead Masked. Alpha texture example:

-
7 – Generate MinMaps. Generate texture copies in lower resolution.
8 – Detail Hack? Only for Detail textures (read below). For blurring textures depends of distance.
Texture dimensions must be equal to power of 2 (16; 32; 64; 128; 256; 512 etc.).
Supported texture formats: dds, tga, bmp, pcx, upt.
dds (DirectDraw Surface) is the best choice. After import you may convert any texture to dds using Tools > Compress. There are 3 types of compression: DXT1 – non transparent (best compression), DXT3 – with explicit alpha channel (good for light stuff), DXT5 – with interpolated alpha. DXT5 is most versatile. More about dds format read here.
To export any texture select File > Export or RMB > Export to File…
-
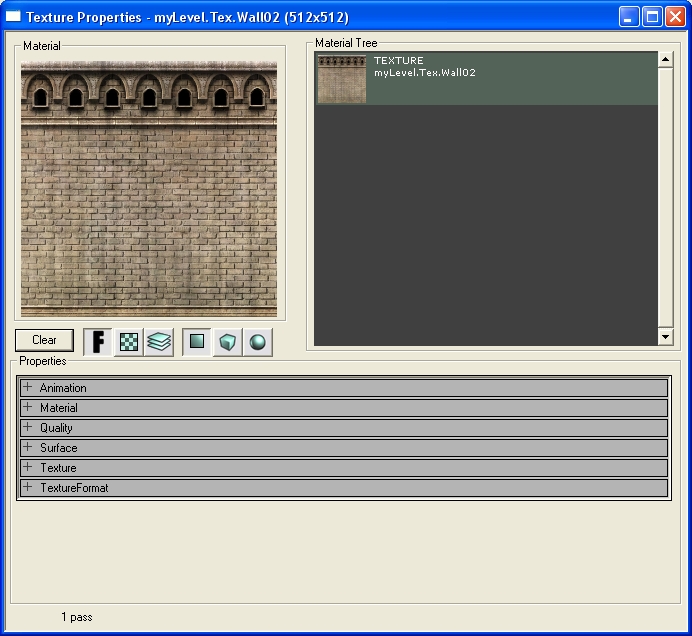
Animation – For making animated texture. But not the best way to create it.
Material – Texture material. Select required one in Surface Type for collision sound and particles effect (wood, glass, metal etc.).
Quality – Color and Texture quality. Actually useless.
Surface – Has few parameters. bAlphaTexture and bMasked have same purposes as in import window. bTwoSided – make 2-sided texture.
Texture – Here you may add some details for texture (for better edges look).
See examples in default KF package Detailtextures_T.utx

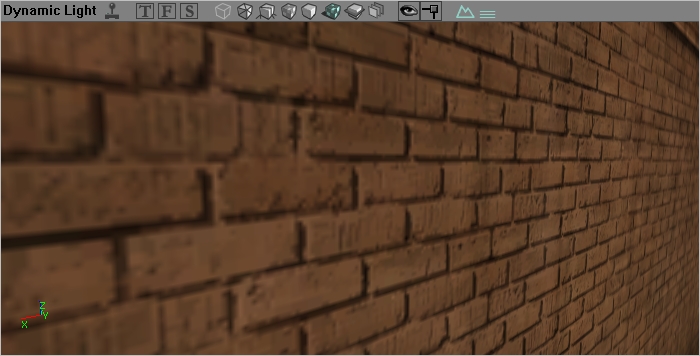
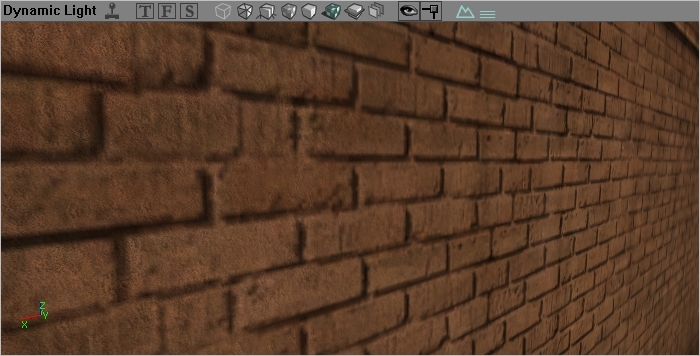
You may add detail by pressing Use in Detail field. In DetailScale you may set relation between details and main texture sizes. See example with(top)/without(bottom) details below.
On this tab you may set LOD itself and its type as well.
-
TextureFormat – Just info.
Making animated texture
There are 2 ways to make it. The first is to import animation frames with ends of filenames _aXX, where XX – frame number starts from 00. E.g.:
name1_a00
name1_a01
name1_a02
etc.
It sets frame number on Animation tab automatically. You may set FrameRate property as well. This way uses for monitors on KF-Icebreaker map.
The second way is MaterialSequence creating. To make it press File > New and window opens:
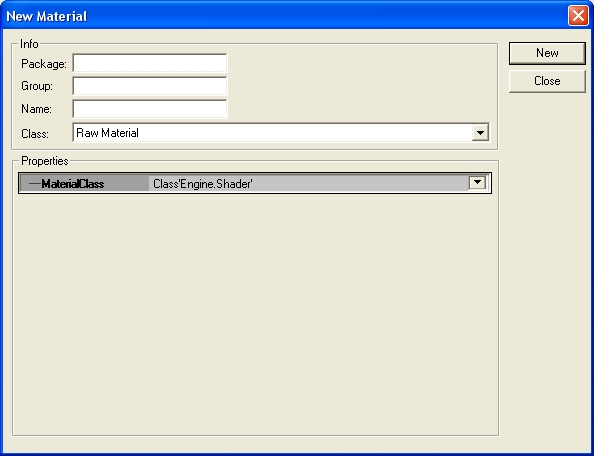
Fill package, group, name and set MaterialClass to MaterialSequence. In SequenceItems fields you may add frames by pressing Add. There are 3 params. Action field: FadeToMaterial – smooth animation (mainly for map previews) and ShowMaterial – sharp frame change. Add texture-frame in Material field. Set the frame duration in Time property.

Created texture is 1 pass now.


Read also:
Tags: killing floor, sdk, working with textures, map making